In this short and simple tutorial, we will share everything you need to know about DERO’s browser wallet. The aim is to provide clear instructions so that users without any previous experience take a quick start with the browser-based wallet.
It is important to understand that in order to really own your coins, you must maintain control over your private keys. For your portfolio to be as secure as possible, it is important that these private keys are stored on a physical medium. Whenever you share your private key, it is as if you share your wallet and if your private key is lost, consider your wallet as lost.
The wallet works completely in the browser without any external requirements, it interfaces directly with the DERO daemon without external backend or hidden interface. This means that your keys are yours and they never leave your browser in any form whatsoever, all processing is done in the web browser with the ability to send/receive, import/export multiple wallet and anyone can host a web wallet. It is extremely lightweight and all communications are encrypted SSl/TLS with the deamon. However, it is essential to do the following actions on a healthy device, free of any type of virus, trojan, malware, etc. Otherwise, the security of your wallet could be seriously compromised.
Go to the official DERO browser wallet website: https://wallet.dero.io
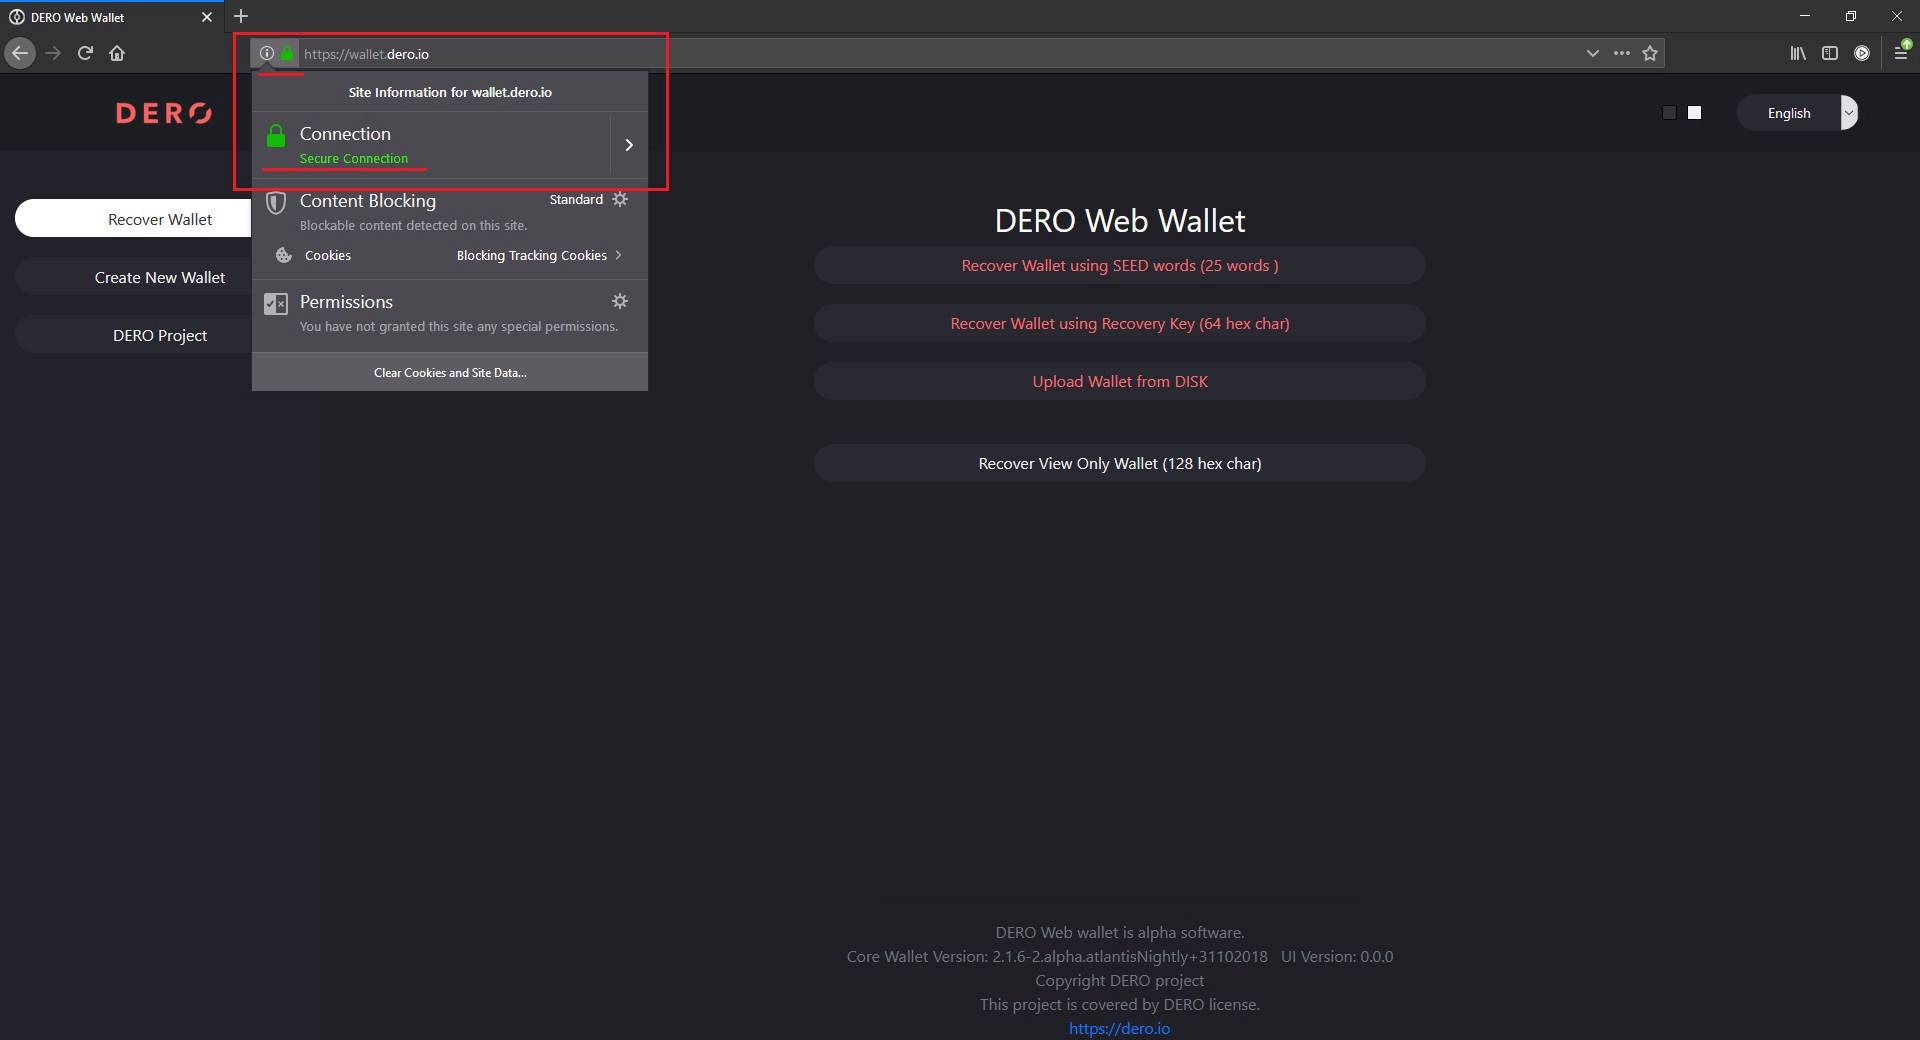
Always validate that you are visiting the correct URL address, that it always starts with “https” and that the site is secure via the padlock by looking at the URL bar.
In this first part, we will see how to create a wallet, send and receive DERO:
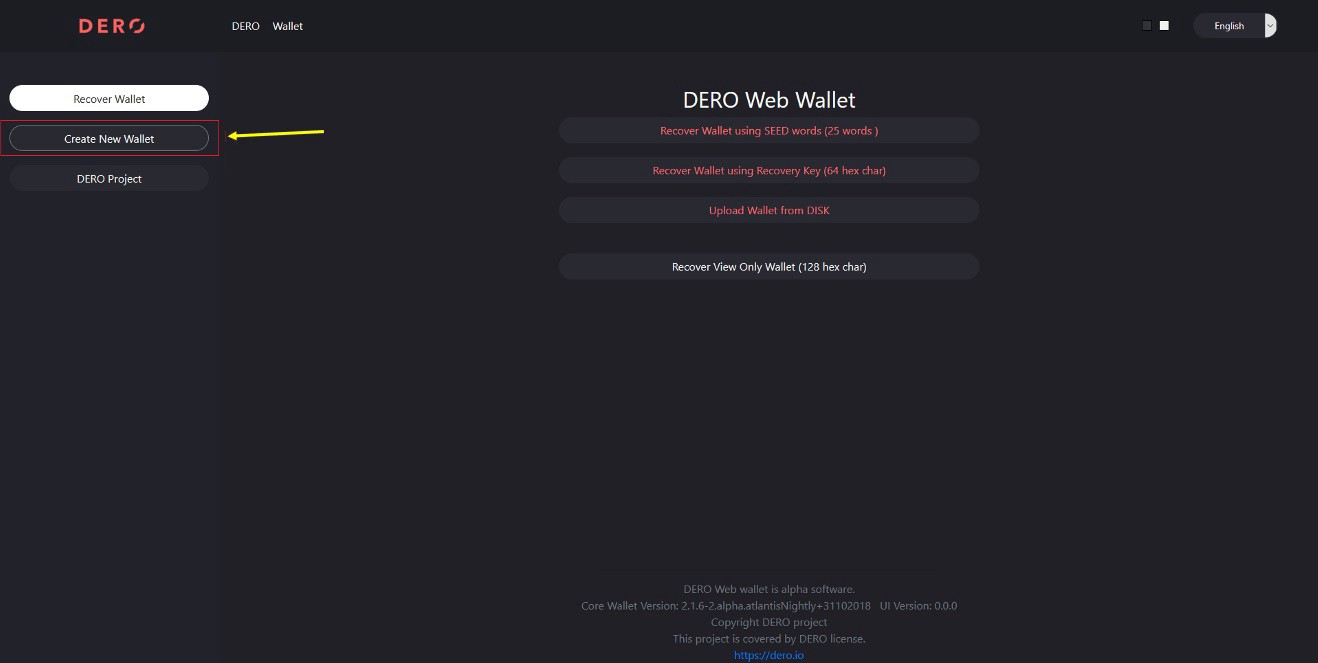
To create your wallet, simply click on the “Create a New Wallet” button in the left menu.
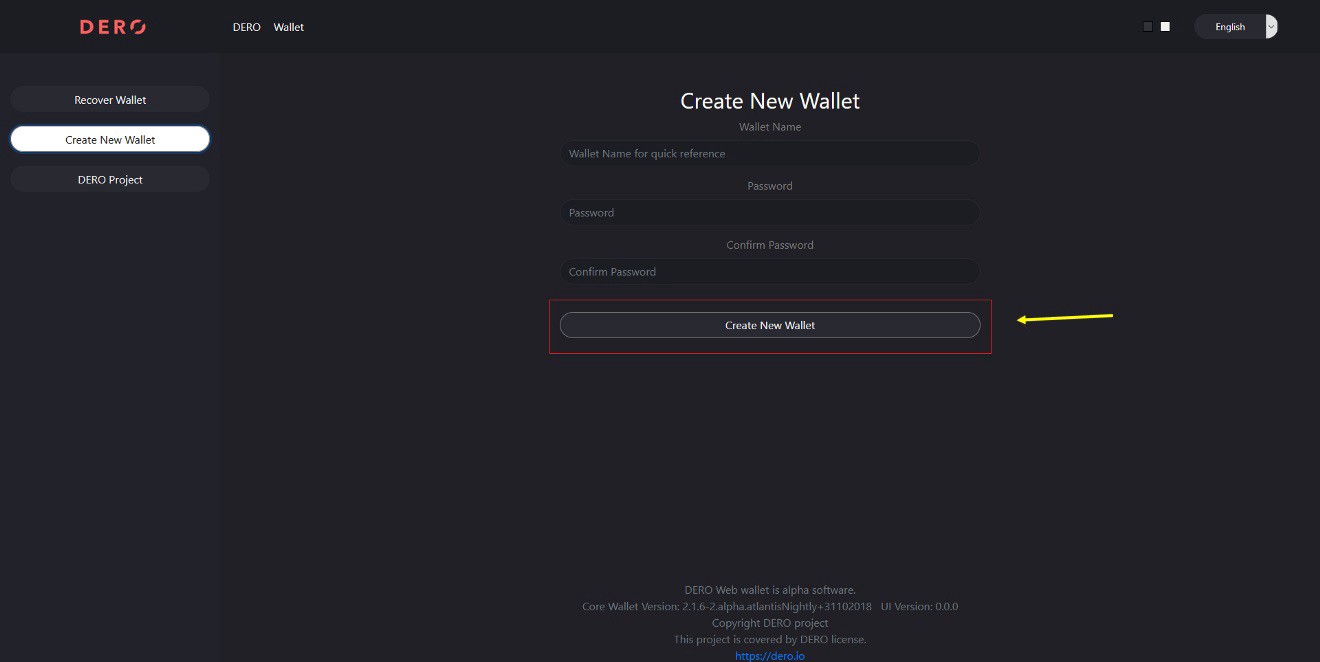
On this page, you will have to choose a name for your wallet and a password (passwords of type 123456, azerty, etc. are to be avoided). Then click on Create New Wallet.
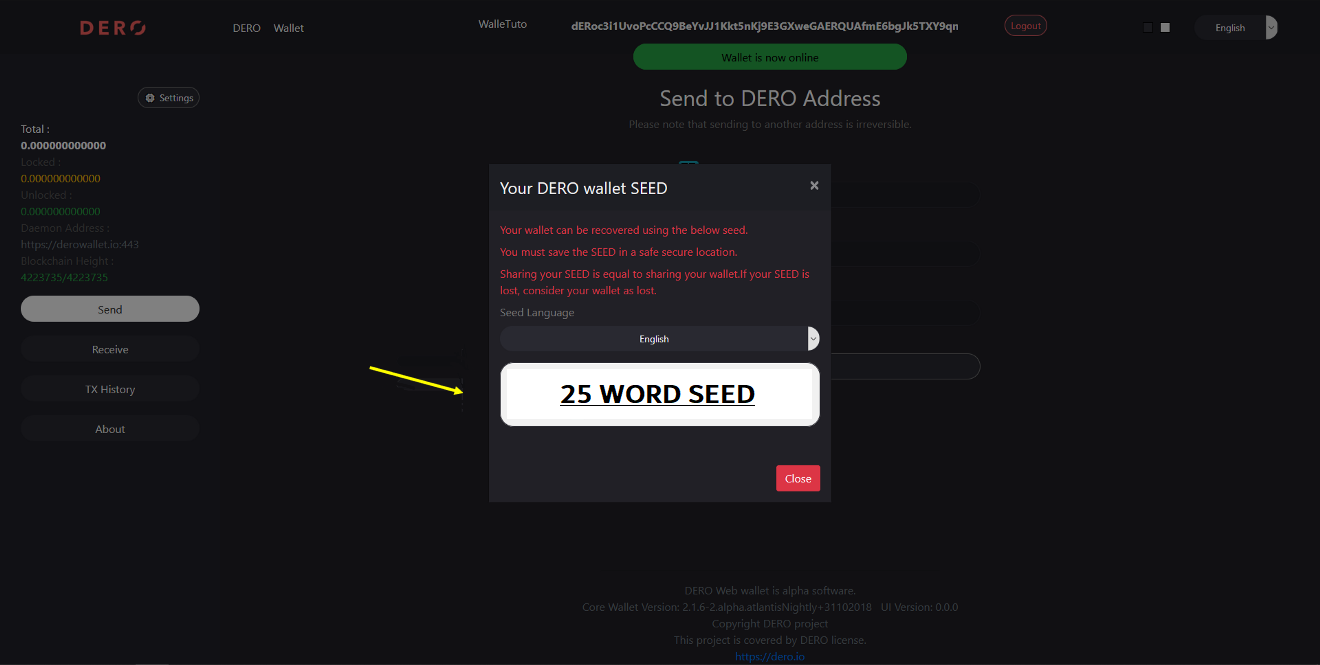
Once you have created your wallet, a 25 word mnemonic phrase (also known as a SEED) will appear. These 25 words are the unique seed of your wallet, they will allow you to recover / restore it at any time. Be sure to write this seed phrase down and keep it in a safe place! Don’t forget: if you share your private key or seed, you are sharing access to your wallet and coins.
Congratulations, you have just created your wallet! You should now see the main interface of your wallet, it has been designed to be as simple and ergonomic as possible. You will find the different menu options with which you can interact. To send DERO to an address, fill in the fields in the central area, with the destination address, the amount and if your recipient has specified the payment ID (often used by exchanges). Remember that transactions on the blockchain are irreversible once initiated, so always double check if the address, amount and payment ID (if provided) are correct.

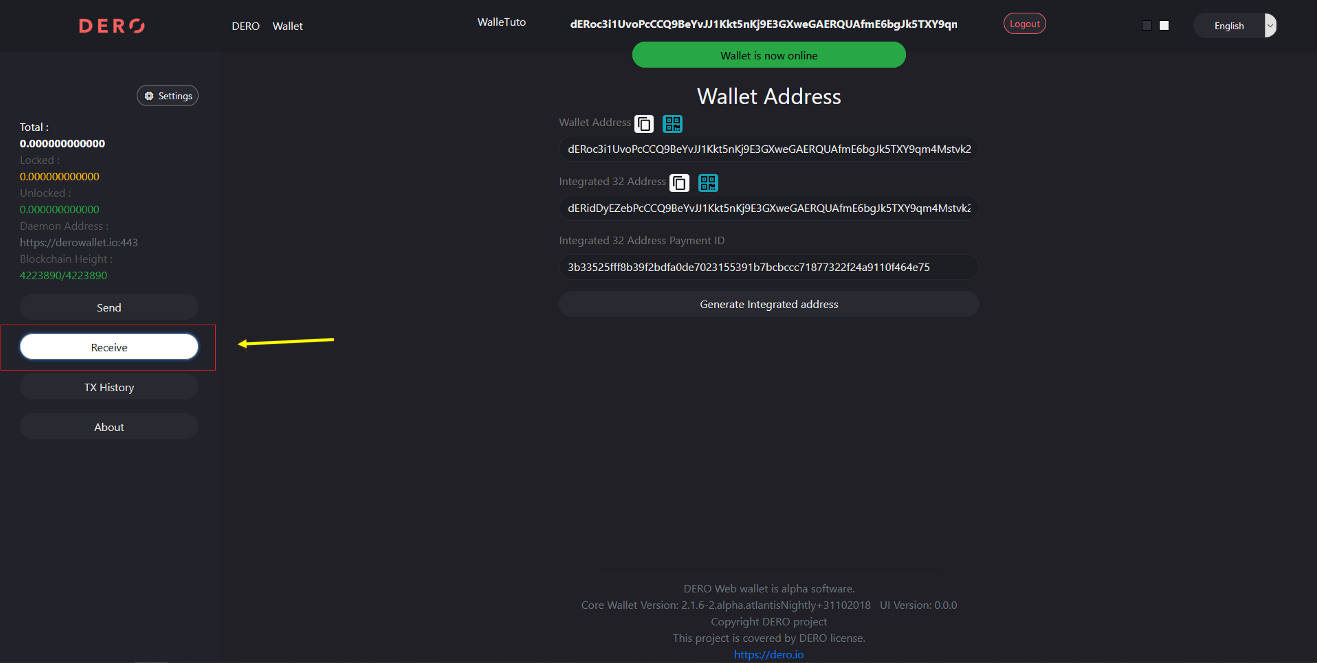
To access the receiving interface, click on the “Receive” button in menu on the left. In this view and just below the title, you will find your public address, the one you will usually provide to someone else to send you some DERO. On the second line you will find your integrated 32 address which is basically a combined address containing your simple public address and a payment ID. On the third line you will see the payment ID. The payment ID is optional and can be used to identify payments more precisely by the receiving end. Pay attention when sharing your address, if you provide an incomplete and/or incorrect address, the funds transferred may be at risk of being lost, so check very carefully when handling them. None of these addresses shown here allow access to your account or view your transactions, so these are safe to share.
Below the receiving button you will find the Transactions (TX) button. This view will allow you to see previous transactions with the amount, date and transaction ID. You can also export your transactions in CSV format. The transaction ID is useful if you want to obtain more details about how the transaction was processed on the blockchain, this can be consulted on the DERO Explorer: https://explorer.dero.io

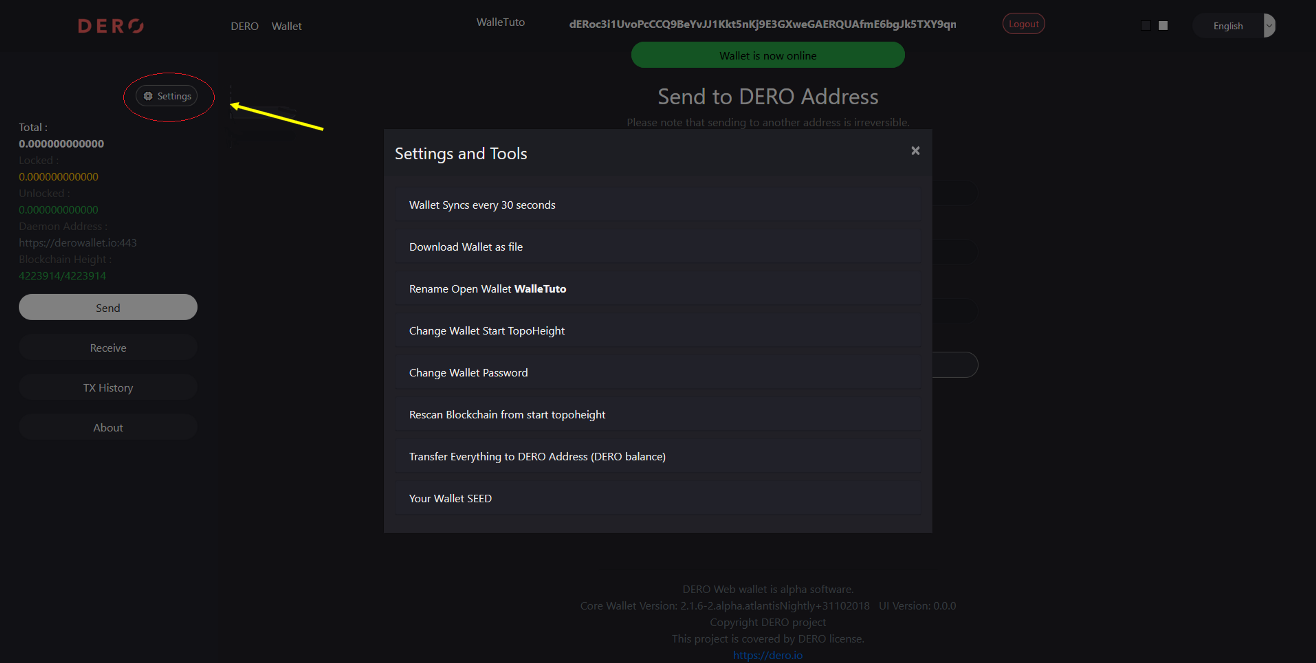
Via the “Settings” button, as you can see in the image below, you have options such as sending all your funds to another wallet, changing your password, changing the name of your wallet, etc. You also have access to your mnemonic phrase (SEED) and you can also save your wallet file locally so you can restore it in this way.
In this second part, we will see how to restore a wallet:
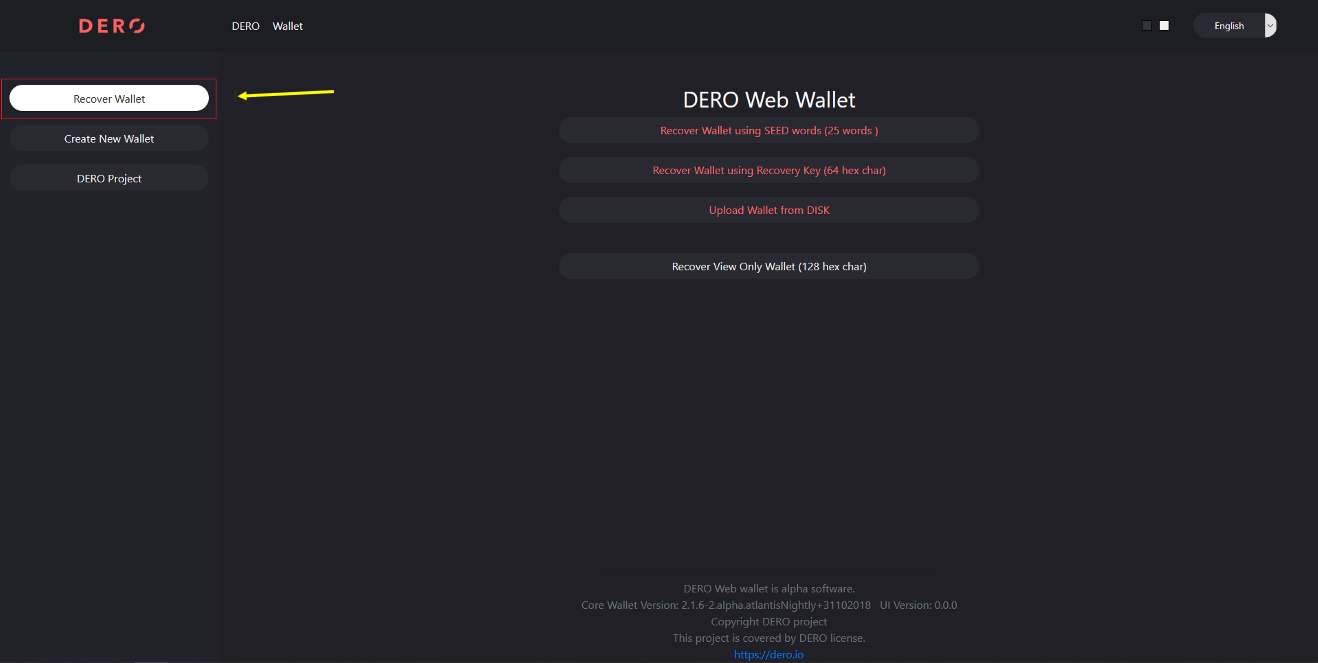
Restoring a wallet means recovering a wallet which was created in the past. To do this, you will need to go to the “Recover Wallet” tab. You will have 3 choices to make, the first one will allow you to restore your wallet with the mnemonic phrase (SEED) which was provided when you created your wallet. Secondly, recovery is possible via your private recovery key, and the third choice is available if you have previously saved your portfolio file locally. The last option allows you to view your account balance via the so called viewkey.
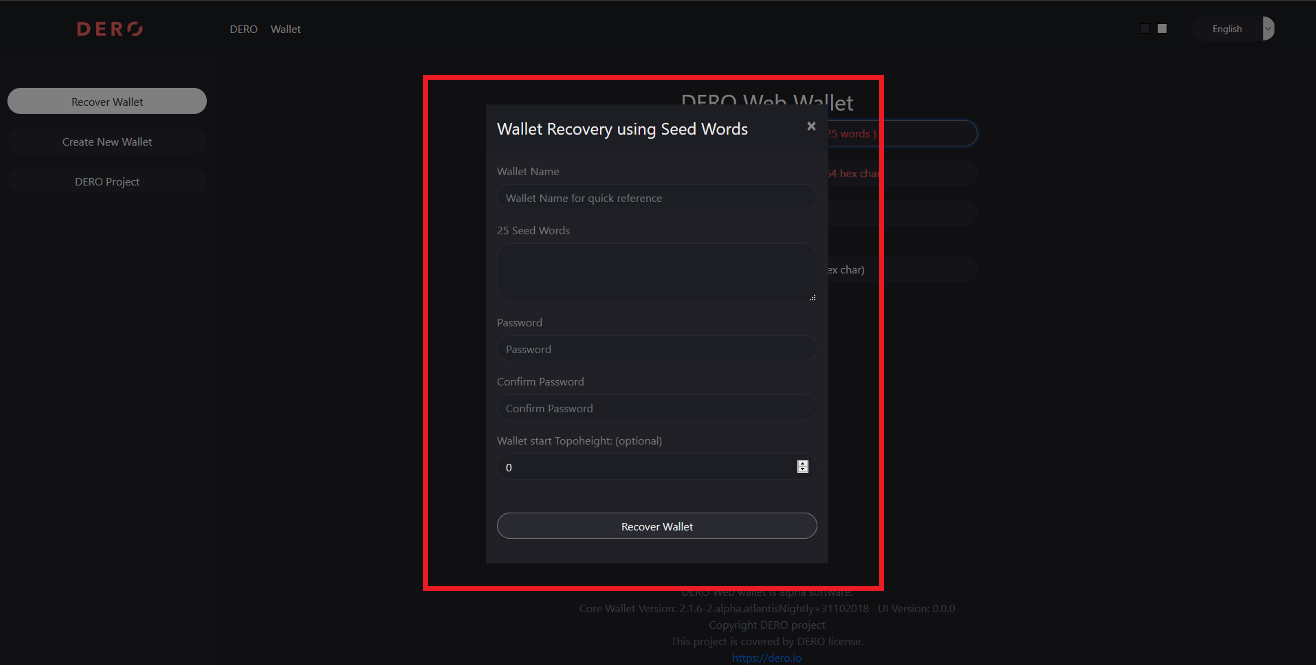
To restore your wallet with the mnemonic phrase (SEED), complete the fields as shown in the image below: Name of your wallet, Seed, Password, wallet start topoheight and then click on “Recover wallet”. Wallet start topoheight is a blockchain block number in which you may have received your first transaction, it avoids the need to re-synchronize all previous blocks in which you had no transactions, if not sure leave it to zero.
In order to restore your wallet with your private recovery key, simply fill in the fields as shown in the image below: Name of your wallet, Seed, Password and wallet start topoheight, and then click on “Recover wallet”.

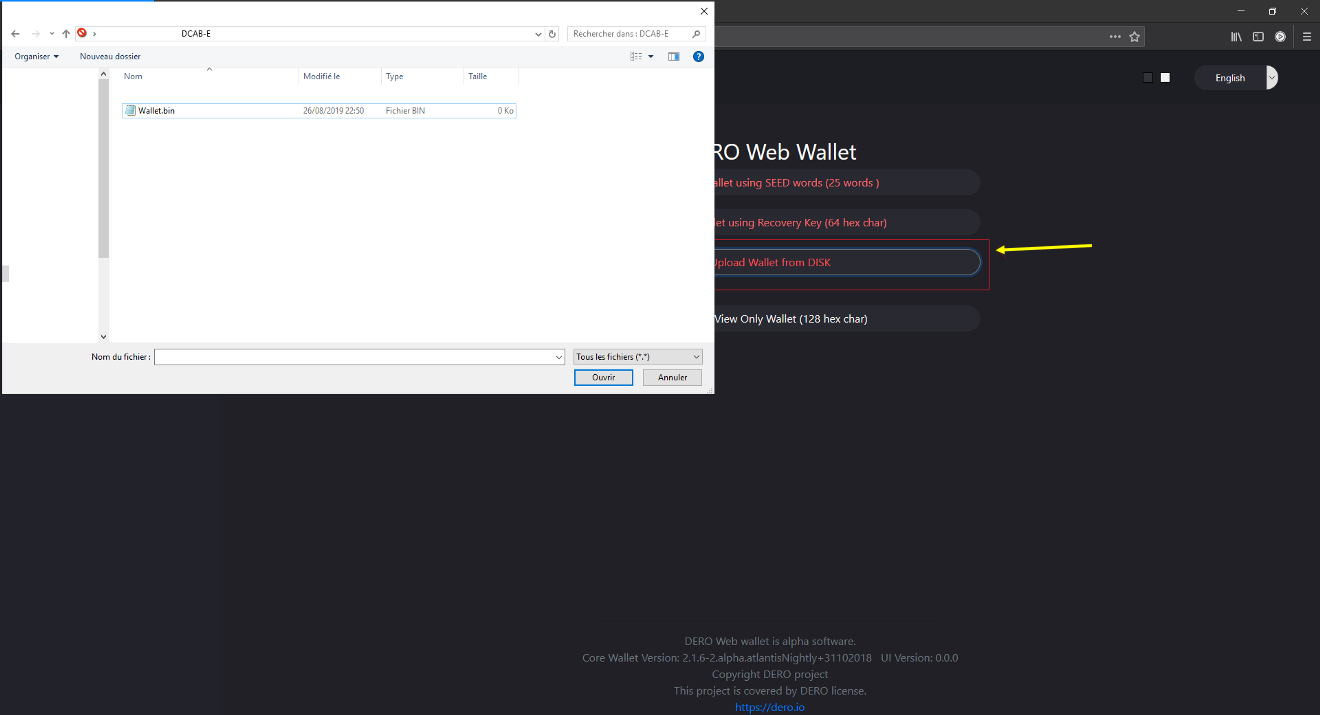
In order to restore your wallet with a locally stored wallet file, simply choose the third option and select the file in your wallet on your PC / MAC, as shown in the image below. Once you have selected your file, simply open it by entering your password.
From now on, the DERO browser wallet should no longer have secrets, you know how to create, restore a portfolio and also perform basic operations such as receiving or sending dero. It may be that sometimes the balance of your balance does not correspond to your expectations, you will have to wait until the blockchain is fully synchronized.
If you need help or have any questions about this, please feel free to consult the official supports of the DERO community, such as Discord, Telegram, Twitter or Bitcointalk (links available at the bottom of the page).
*** The tutorial is provided for information purposes only. I assume no responsibility for any errors or possible results caused by the implementation of the methods presented on this page. I am in no way responsible for your manipulations, if there are errors or if procedural changes occur, I am not responsible for them.***
This tutorial was written by the members of the DCAB-E GFox and Noshyxa